


Working with Vector tiles - Part 2 - DAE
the workshop starts here
Maplibre is a open source JavaScript library that uses WebGL to render interactive maps from vector tiles and Mapbox conform styles.
This workshop will help you and add our own data to the map and accordingly learn the styling of vector tiles.
Customizing our maps
When using Maptiler maps the style url contains all information that is needed to show the vector tile map. We call this the Map style and it is defined according to the Maplibre style specification.
The map style is written as (json) rules which define the maps visual appearance. It includes:
- What data to draw: Sources
- What order to draw the data in: Layers
- How to style the data when drawing it: Layers
- Which fonts and icons to use: Glyphs & Fonts
The basics of such a JSON file looks like this:
var mystyle = {
    "version": 8,
    "name": "Mijn eigen Stijl",
    "sprite": "url",
    "glyphs": "url/{fontstack}/{range}.pbf",
    "sources": {...},
    "layers": [...]
}
The 2 most important for now are the sources and the layers. The sources tell us where our data is coming from. Vector Tiles or GeoJSON data for example. By setting layers we can style every separate layer available in the vector tiles and assigning it colours etc.
Adding data
When adding data to our vector based map, we do not only need the data (source) but we also need to style (style layer) the data. This goes for vector tiles but also separate data files as well.
There are a few options of adding data to your map:
- inline code - for (very!) small datasets
- File attachment (as geojson) - for small datasets
- Upload data to Maptiler for hosting as vector tiles - for large datasets
We will work through some of the options to also learn how to work with the styling layers of the Maplibre style spec. Because there are also different ways to style vector tiles:
- Creating a style with the help of the Maptiler design tool. We already did this in the previous workshop.
- Creating custom styles in javascript code
- Creating and/or modifying a style.json file
So Let’s start with a simple example using inline data and inline code for styling.
Inline data
Let’s add some simple points from a GeoJSON object to our map.
Go to geojson.io and create a geojson with at least 5 point objects. Give each point a property name and a value.
You will have something like this:
{
  "type": "FeatureCollection",
  "features": [
    {
      "type": "Feature",
      "properties": {
        "name": "Almere"
      },
      "geometry": {
        "type": "Point",
        "coordinates": [
          5.213184356689453,
          52.373083994540266
        ]
      }
    },
    {
      "type": "Feature",
      "properties": {
        "name": "mijn Huis"
      },
      "geometry": {
        "type": "Point",
        "coordinates": [
          5.263652801513672,
          52.376123154904604
        ]
      }
    }
  ]
}
Copy the geoJSON. Paste it into the main.js to a variable with the geoJSON.
// Make a GEOJSON
var mygeoJSON = {
  "type": "FeatureCollection",
  "features": [
    {
      "type": "Feature",
      "properties": {
        "name": "Almere"
      },
      "geometry": {
        "type": "Point",
        "coordinates": [
          5.213184356689453,
          52.373083994540266
        ]
      }
    },
    {
      "type": "Feature",
      "properties": {
        "name": "mijn Huis"
      },
      "geometry": {
        "type": "Point",
        "coordinates": [
          5.263652801513672,
          52.376123154904604
        ]
      }
    }
  ]
};
🔗 Read about GeoJSON format here
Now we have some data defined inside our code. In order to add this to our map. We first need to create a source for this data.
Add the geoJSON as a source. Copy the code below into your js file.
// On Load add GeoJSON SOURCE
map.on('load', function (e) {
    // ADD GEOJSON SOURCE
    map.addSource('punten', {
        'type': 'geojson',
        'data': mygeoJSON
    });
});
ℹ️ We need to put the creation of the source inside a function map.on(load) to tell the program to wait until the map is done loading.
ℹ️ with map.addSource we add an extra source to the map.
ℹ️ the data property points to our earlier defined variable mygeoJSON containing our geojson points. The type tells the map it is of a geojson format type.
Now we still wont see our data on the map. Because only the data source is made available to the map. The data that we want to visualize has also to be added as style layer. Let’s add this to the function:
// On Load add GeoJSON SOURCE and LAYER
map.on('load', function (e) {
    // ADD GEOJSON SOURCE
    map.addSource('punten', {
        'type': 'geojson',
        'data': mygeoJSON
    });

    // ADD a style layer
    map.addLayer({
        'id': 'geojson-points',
        'type': 'circle',
        'source': 'punten',
        'layout': {},
        'paint': {
            'circle-color': '#000fff',
            'circle-radius': 10
        }
    });
});
ℹ️ map.addLayer adds an extra layer to the map, on top off the map.
ℹ️ Do you see how the 'source': 'punten', in the style layer, points to the source name we give in the addSource function? This is very important!
Now, we will see a few blue circles on the map! This is of course a very simple styling, so let’s see if we can make it more interesting!
Get feature information in pop-up
We can also see attribute information about a feature on a mouse click.
Add the following code to your JavaScript and change the layer-name to the style layer id you want to query. In our case the points.
// Get polygon information
map.on('click', 'geojson-points', function (e) {
console.log(e.features[0]);
new mapboxgl.Popup()
    .setLngLat(e.lngLat)
    .setHTML(e.features[0].properties)
    .addTo(map);

});
Refresh your browser. Does the pop-up show up when you click on a feature?
ℹ️ The console.log statement logs the first feature of the clicked object e. Check your console logs for any errors or information about the feature. See if you can change the pop-up properties so it shows the information you want to see about object e.
Inside the popup we can even add html with photos or images!
Adding a hover effect
We need an extra layer in the style for the hover effect. We make the layer with an empty filter. So it does not show up on the map on initialization.
We can create multiple style layers per source!
So add another style layer:
map.addLayer({
        'id': 'points-hover',
        'type': 'circle',
        'source': 'punten',
        'layout': {},
        filter: ["==", "name", ""],
        'paint': {
            'circle-color':
                "#eeff00",
            'circle-radius': 10
        }
    });
With the mousemove event we can change the filter so the layer is renders exactly what we want. We appoint the mousemove event to the first style layer with the points:
Add this code at the bottom of the js code.
//Adding hover effect
map.on("mousemove", "geojson-points", function (e) {
    map.setFilter("points-hover", ["==", "name", e.features[0].properties.name]);
});

map.on("mouseleave", "geojson-points", function () {
    map.setFilter("points-hover", ["==", "name", ""]);
});
When you refresh your browser the Admin layer will change color on your mouse movement!
Our own style.json file
The styling code we just used in javascript have the same specs as the styling object of our vector tiles! Let’s see if we can also make our own vector tile document.
Go back to the Maptiler page and go to your own style map overview page.
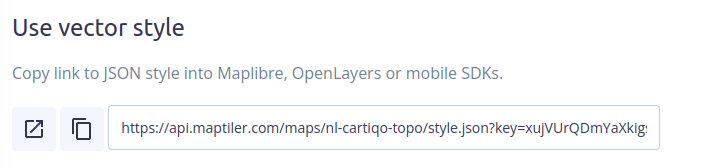
When you scroll down a bit you will see links that we can use in our own web page.
Copy the Vector Style link
For example, mine looks like this:
https://api.maptiler.com/maps/niene-style/style.json?key=<MyAPIkey>
Open this url in your browser!
You will see something like this:
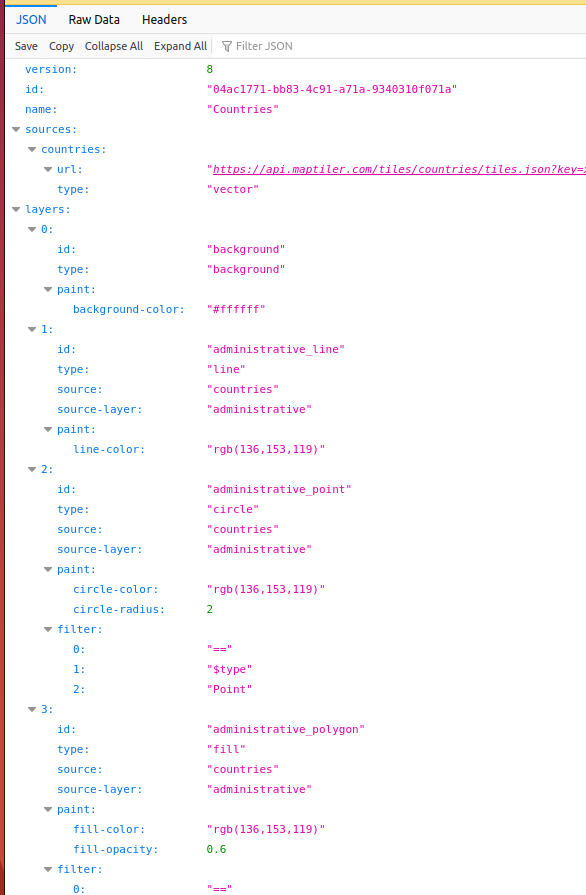
:infomation_source: Do you recognize the layer styling rules from the previous steps? The JSON styling file contains the same content as defining a layer style in javascript!
Save the file as style.json in the directory of your web page.
Now refer to this file in the code instead of the url:
var map = new maplibregl.Map({
    container: 'map', // container id
    style: 'style.json', // style URL
    center: [0, 0], // starting position [lng, lat]
    zoom: 1, // starting zoom
    hash: true
});
We are now hosting our own style! This means that when we edit the style.json file. The map wil change it’s visualisation. Give it a go!
Change the styling visualisation of some layers and see what happens to the map!
Some styling tips
- The order of the layers in your
styleis the order of drawing. So first defined layer, “background”, is drawn first, the next layer is drawn on top, etc. - The labels placing priority is also depended on the layer order. Layers at the top have less drawing priority, layers at the bottom of the file have more drawing priority!
- Is your map slow? Check out 🔗 Improve the performance of your MapboxGL map
- Using a lot a fill-extrusions will also make your map slow.
All possibilities of styling can be found here:
https://maplibre.org/maplibre-style-spec/
Put your map online
Put your map online with the Hosting on Github tutorial!
You reached the end of this workshop!